Wednesday, January 21, 2015
Skinning Continued
After last week, I was pondering how I was going to apply the remaining skin panels to the boat. My thinking was that I needed to have some idea where the center panel (next one after the aft panel) needed to end so that the front panel could be covered with a single sheet of plywood and at the same time, leave the joint between the center and front panel flat enough to use a butt joint.
Readers may recall, that I had originally intended on making a single 24 foot long piece of plywood using scarf joints and then attempting to apply that panel in one shot. Knowing what I know now, I am glad I did not attempt to do that. More on that in a few moments.
The scarf joint approach was originally considered because I was afraid that the butt joint wouldnt conform to the curves of the boat all that well. However, the scarf joint approach presented several difficult problems to overcome. First, the length of three panels would have exceeded the length of my garage by 3 feet. I was unwilling to store the panels outdoors.
I though perhaps I could make a heavy paper template of the panels on the boat structure and then rough cut the 24 foot panel down to a more manageable size. But information I read seemed to indicate that this approach was risky because of the different flexibility characteristics of heavy paper when compared to plywood.
The second major challenge was how I was going to handle that large of a piece of plywood when fitting, and even more so when gluing the panel to the boat. I am working alone on this project and do not have a reliable source of extra hands so this was a major consideration.
I considered a hybrid approach where I would install the aft panels separately. The thinking here was that the aft panel butt joint is fairly flat so a scarf joint was not necessary here. I moved forward with that approach and installed both aft panels. Thats where I was at the end of the last posting.
Installing these aft panels made me aware of the amount of work and time required just to install the 8 foot piece of plywood. I was was battling cure times and my personal endurance just getting these installed. I began to realize that installing a much larger piece of plywood was going to be very difficult for me and run the risk of having the epoxy cure to an unworkable state before I finished installing the panel.
I decided to re-examine the possibility of using a second butt joint near the front of the boat. I first needed to get some idea of where an 8 foot panel would end if attached to the front of the boat. Since this area is curved, it was not easily measured. Only by attaching a similar sized piece of wood could I be sure where the second butt joint would be.
I had two full 8 foot long pieces of plywood that were left over from the aft panels. They were narrower but that wasnt a problem. So I clamped them into position on the bow.
This gave me a rough idea where a full panel would end. Then I clamped a scrap piece of plywood over that approximate area clamping to the sheer and the chine and over frame 4. What I was looking for here was the amount of curvature of the panel in a vertical direction. It didnt appear to be too pronounced and I began to have confidence that a second butt joint would work in this area as well.
I examined pictures of other examples of this design built by other builders and I saw that many of them also had butt joints in this same approximate location. At this point I was still thinking that I would install the center panel first and then install the forward panel last. But as I though about it more, I realized that installing the front panel first would be easier and then I would only have to fill in the center with the relatively flat center section. I considered the idea for awhile and could not think of any real reason not to do it this way, so that is the approach I ultimately decided to use.
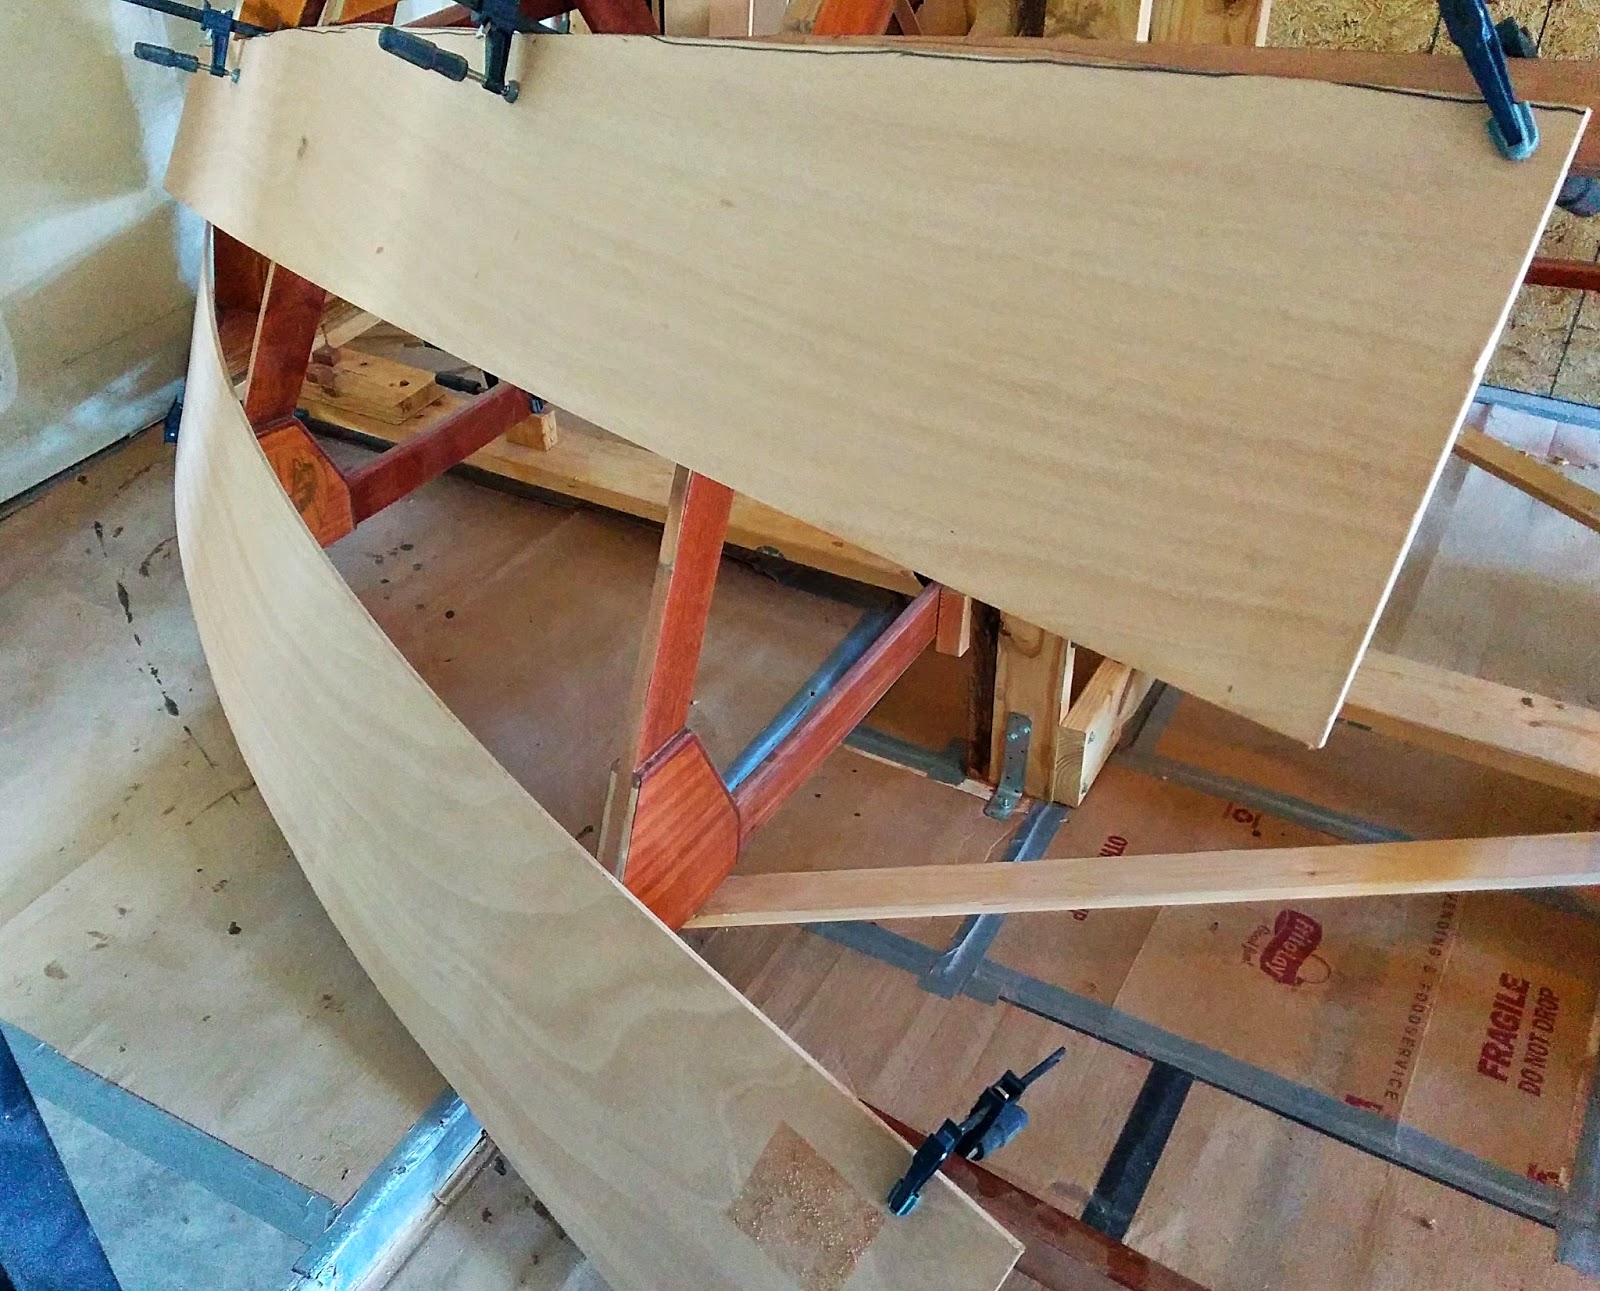
The first order of business was to get a rough trimmed panel. I laid a full sheet of plywood in position and clamped it into place. Then I marked off very rough outlines where I needed to cut the panel.
After cutting these rough outlines, the panel was much easier to clamp back into position. From here I could refine the amount of material to trim off. As material is removed, it becomes progressively easier to re-install the panel because it is lighter and conforms to the curves better.
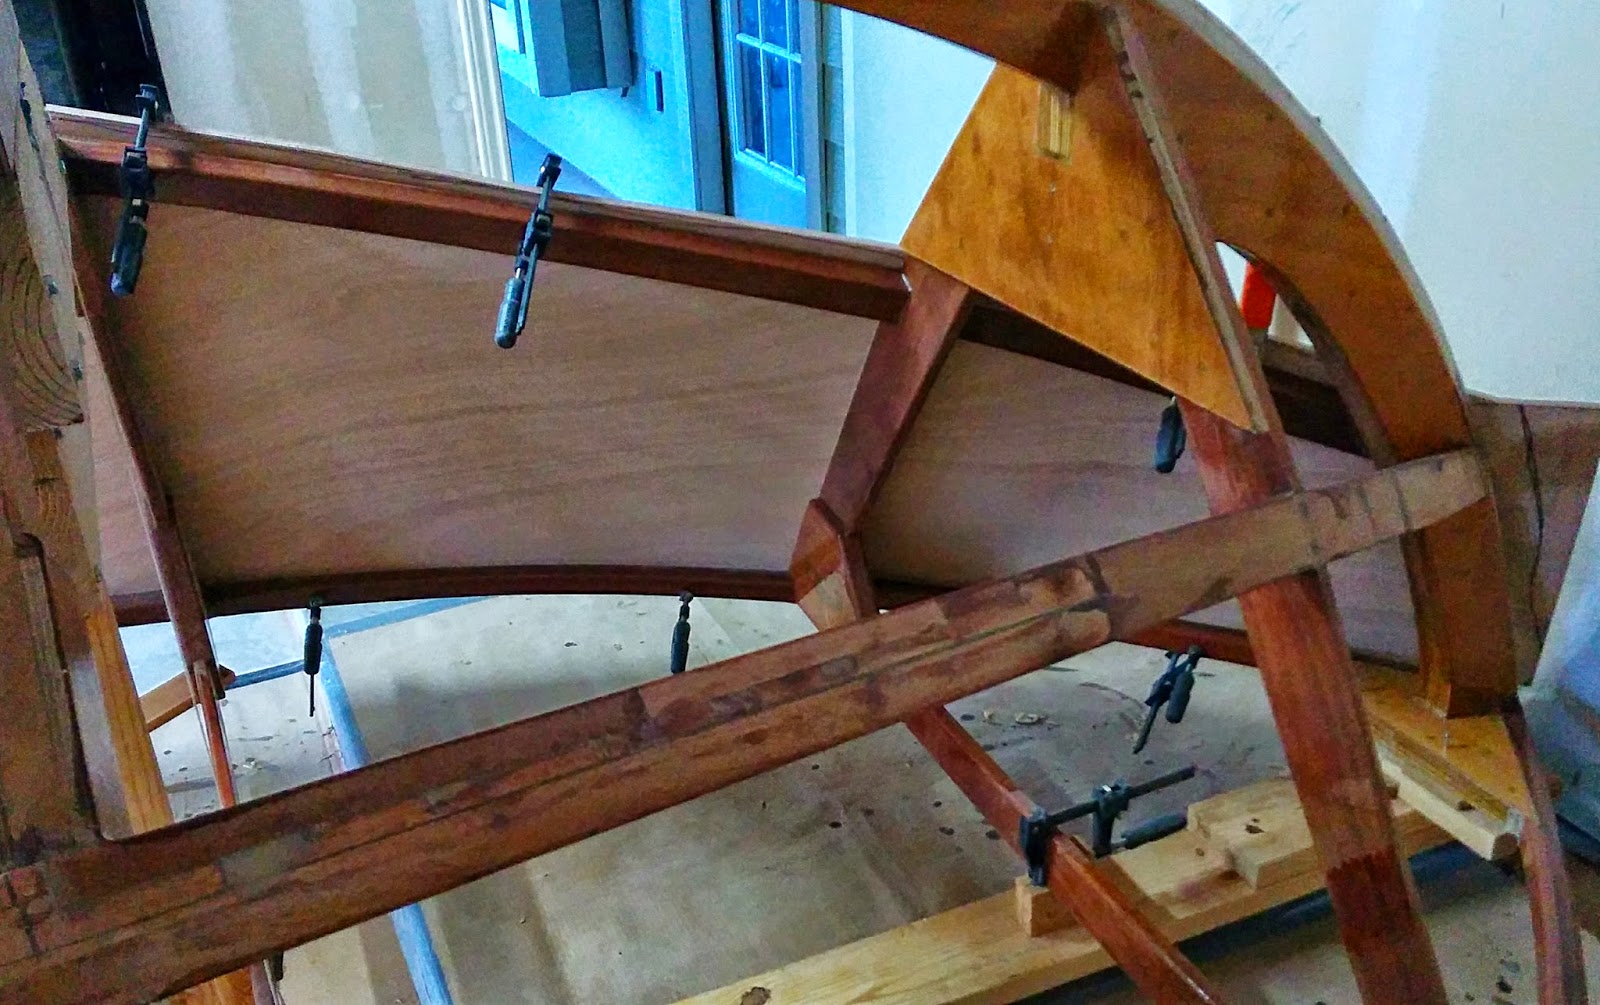
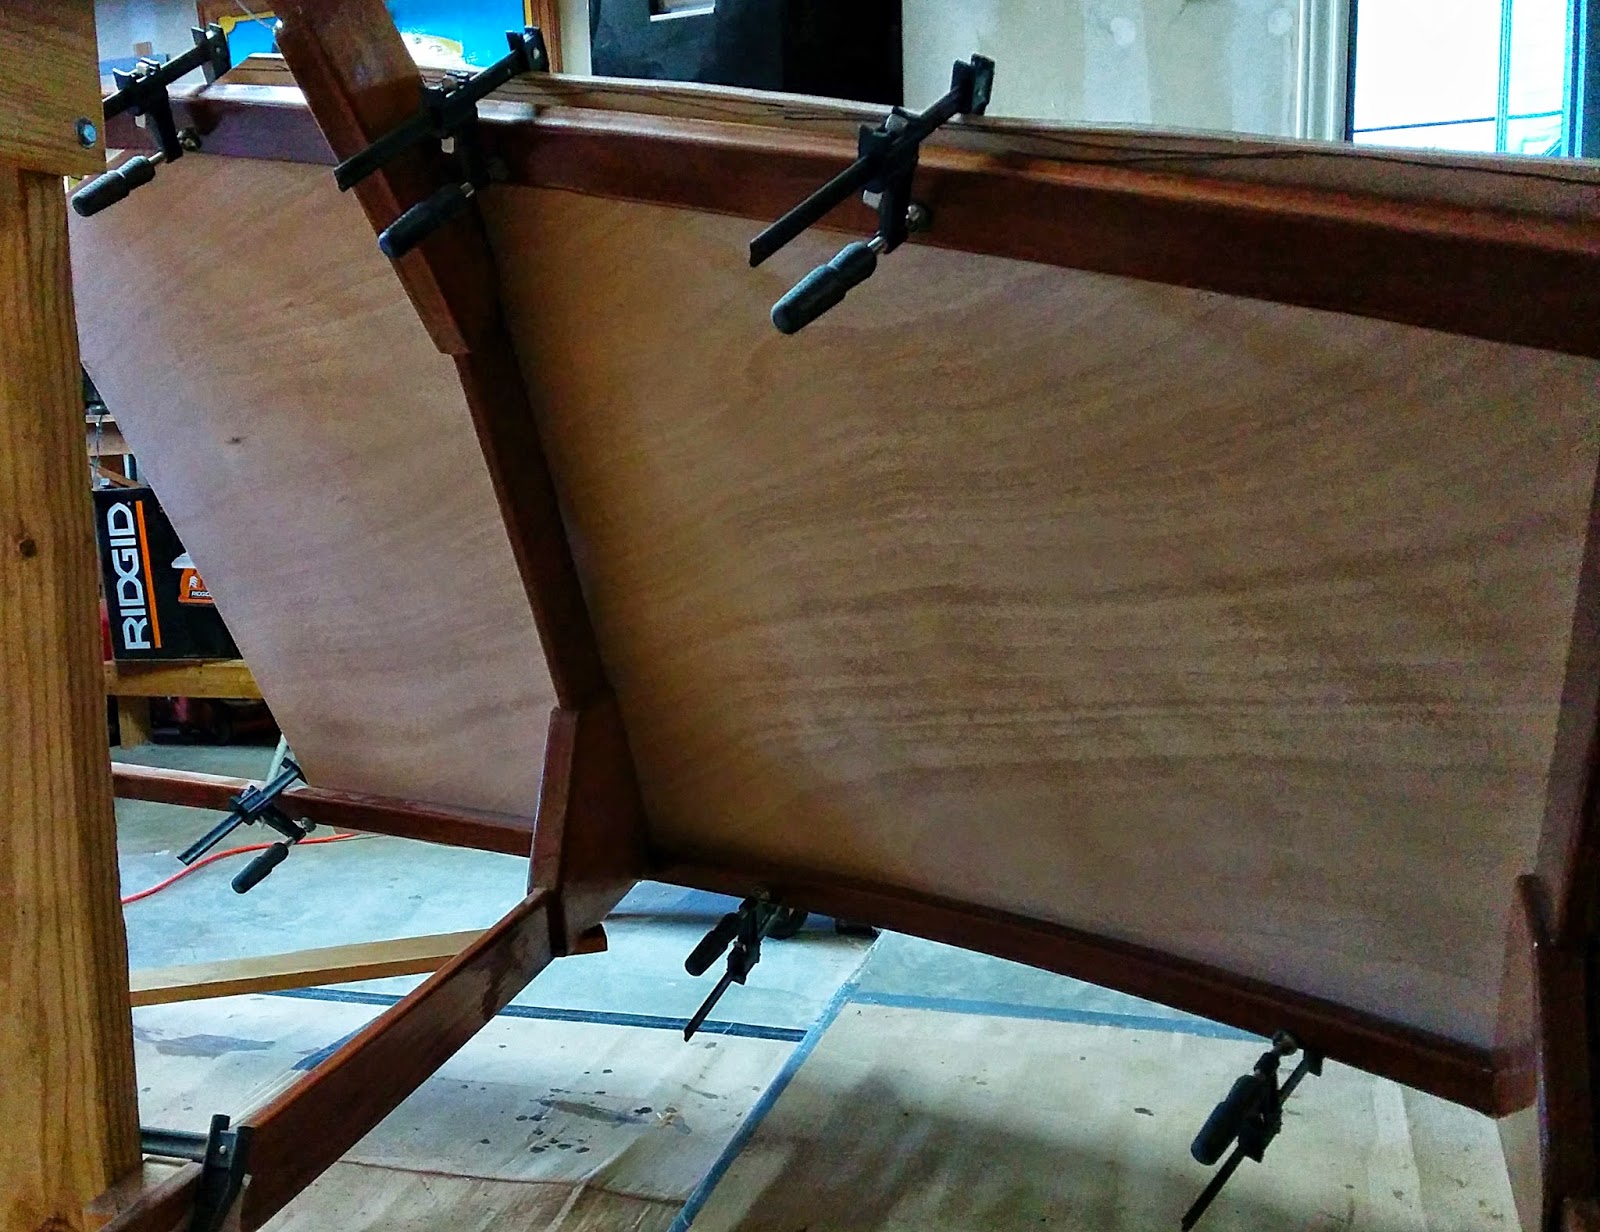
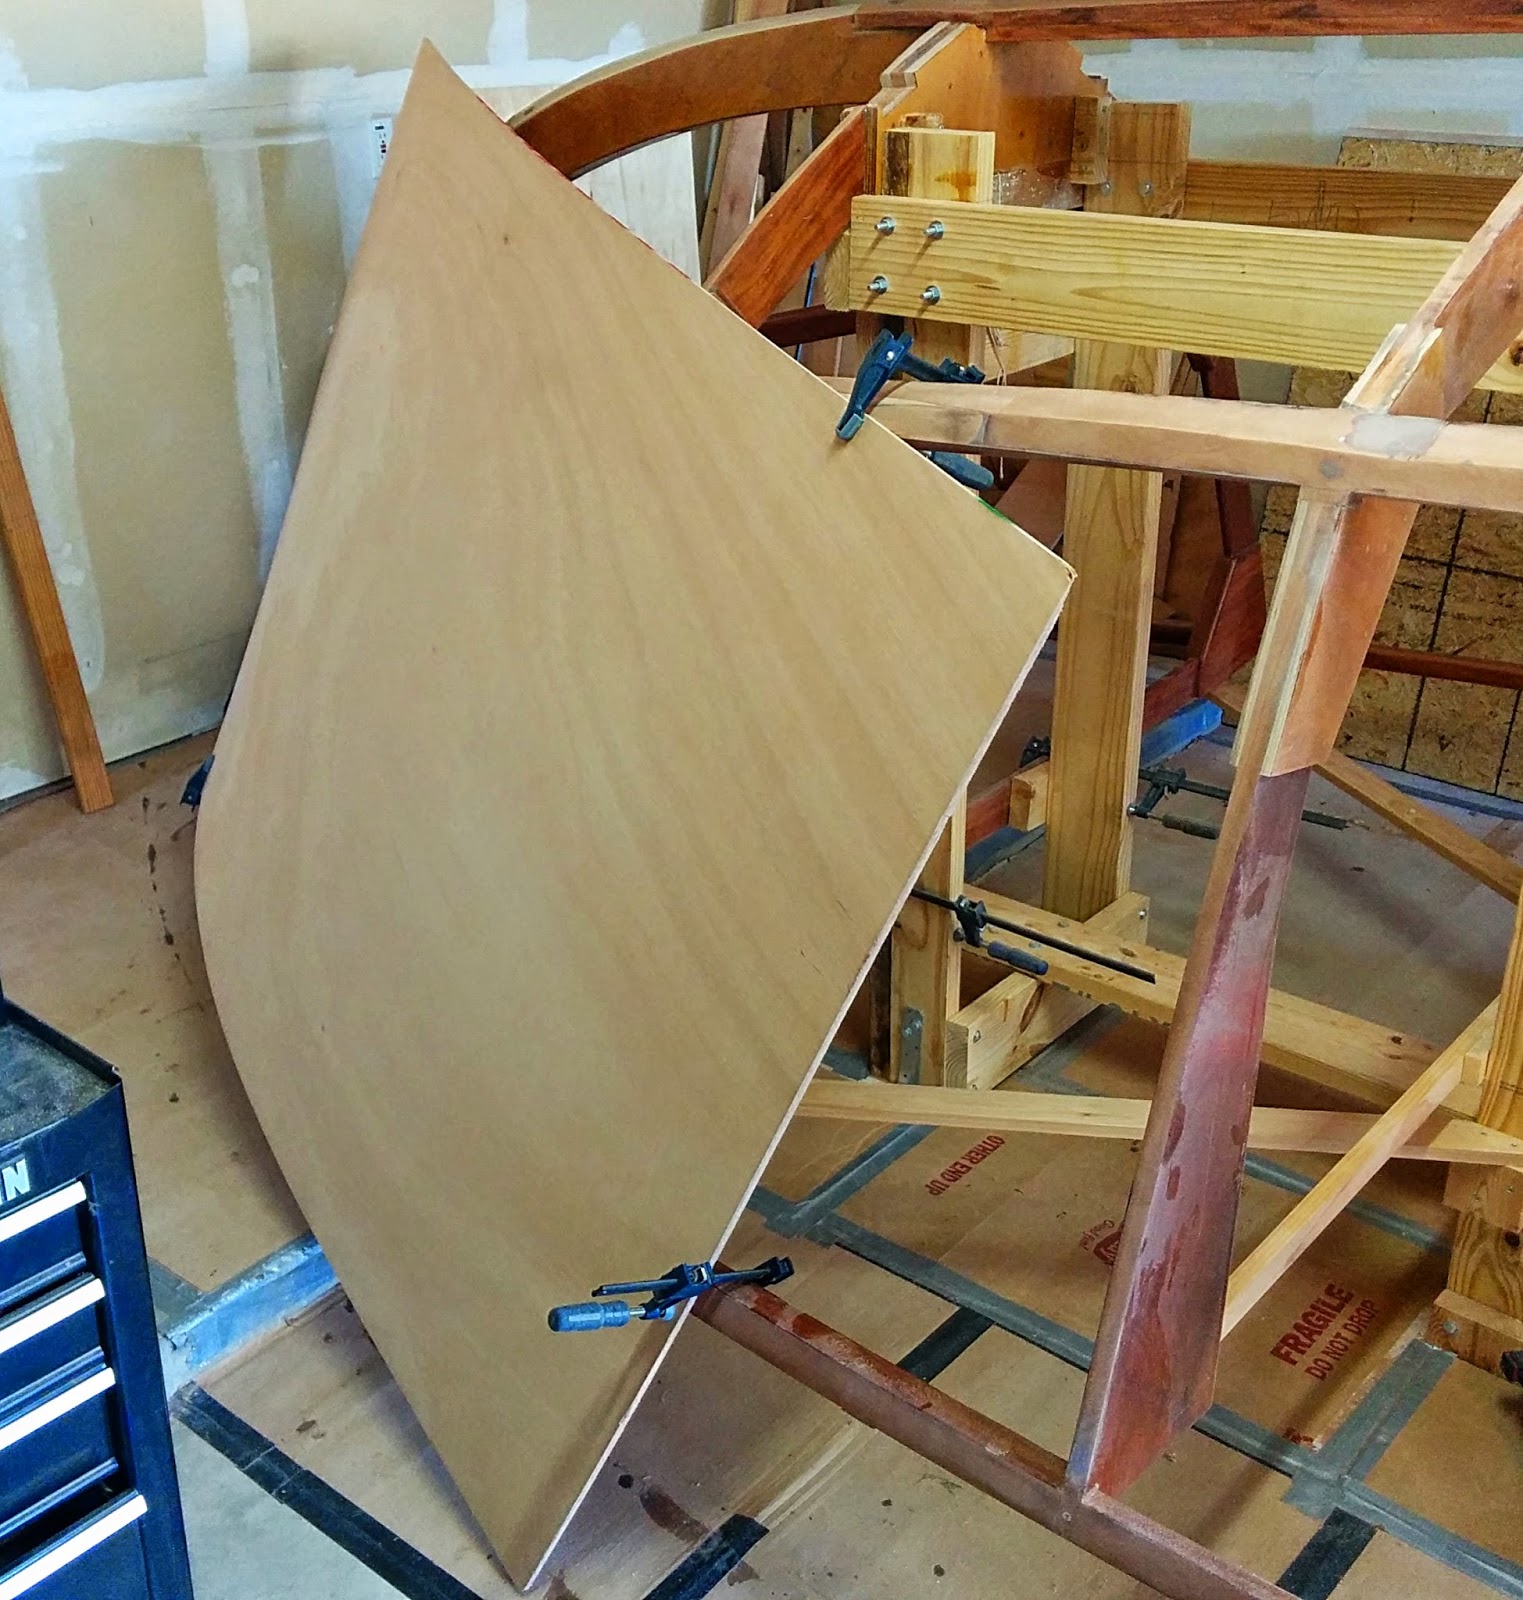
Youll notice in the first of the four photos that there is a vertical line marked on the panel. This would be the cut line for the but joint. Also notice how well the panel conforms to the curve when viewed from the inside. This is a testament to the design of the boat. I did notice that my chine fairing in this area was still a bit flat. This is in the area of the center clamp in the third picture.
I had to take a couple of days and build up the chine in that area before proceeding. Once that was completed, I re-installed the panel again and the fit was much better. Before proceeding further, I took the panel and checked it against the other side of the boat. This served two purposes. First a sanity check to insure that both sides of the boat are the same (they are). Secondly, I was able to use this first panel as a template to rough cut the second front panel from another sheet of plywood.
I took that second panel and test fitted it to the boat on the port side and saw that there would be no problems in getting it to install. A plus was that the chine on that side did not need any additional work. So when I get to that side later this week, I can proceed immediately to the fitting and installation.
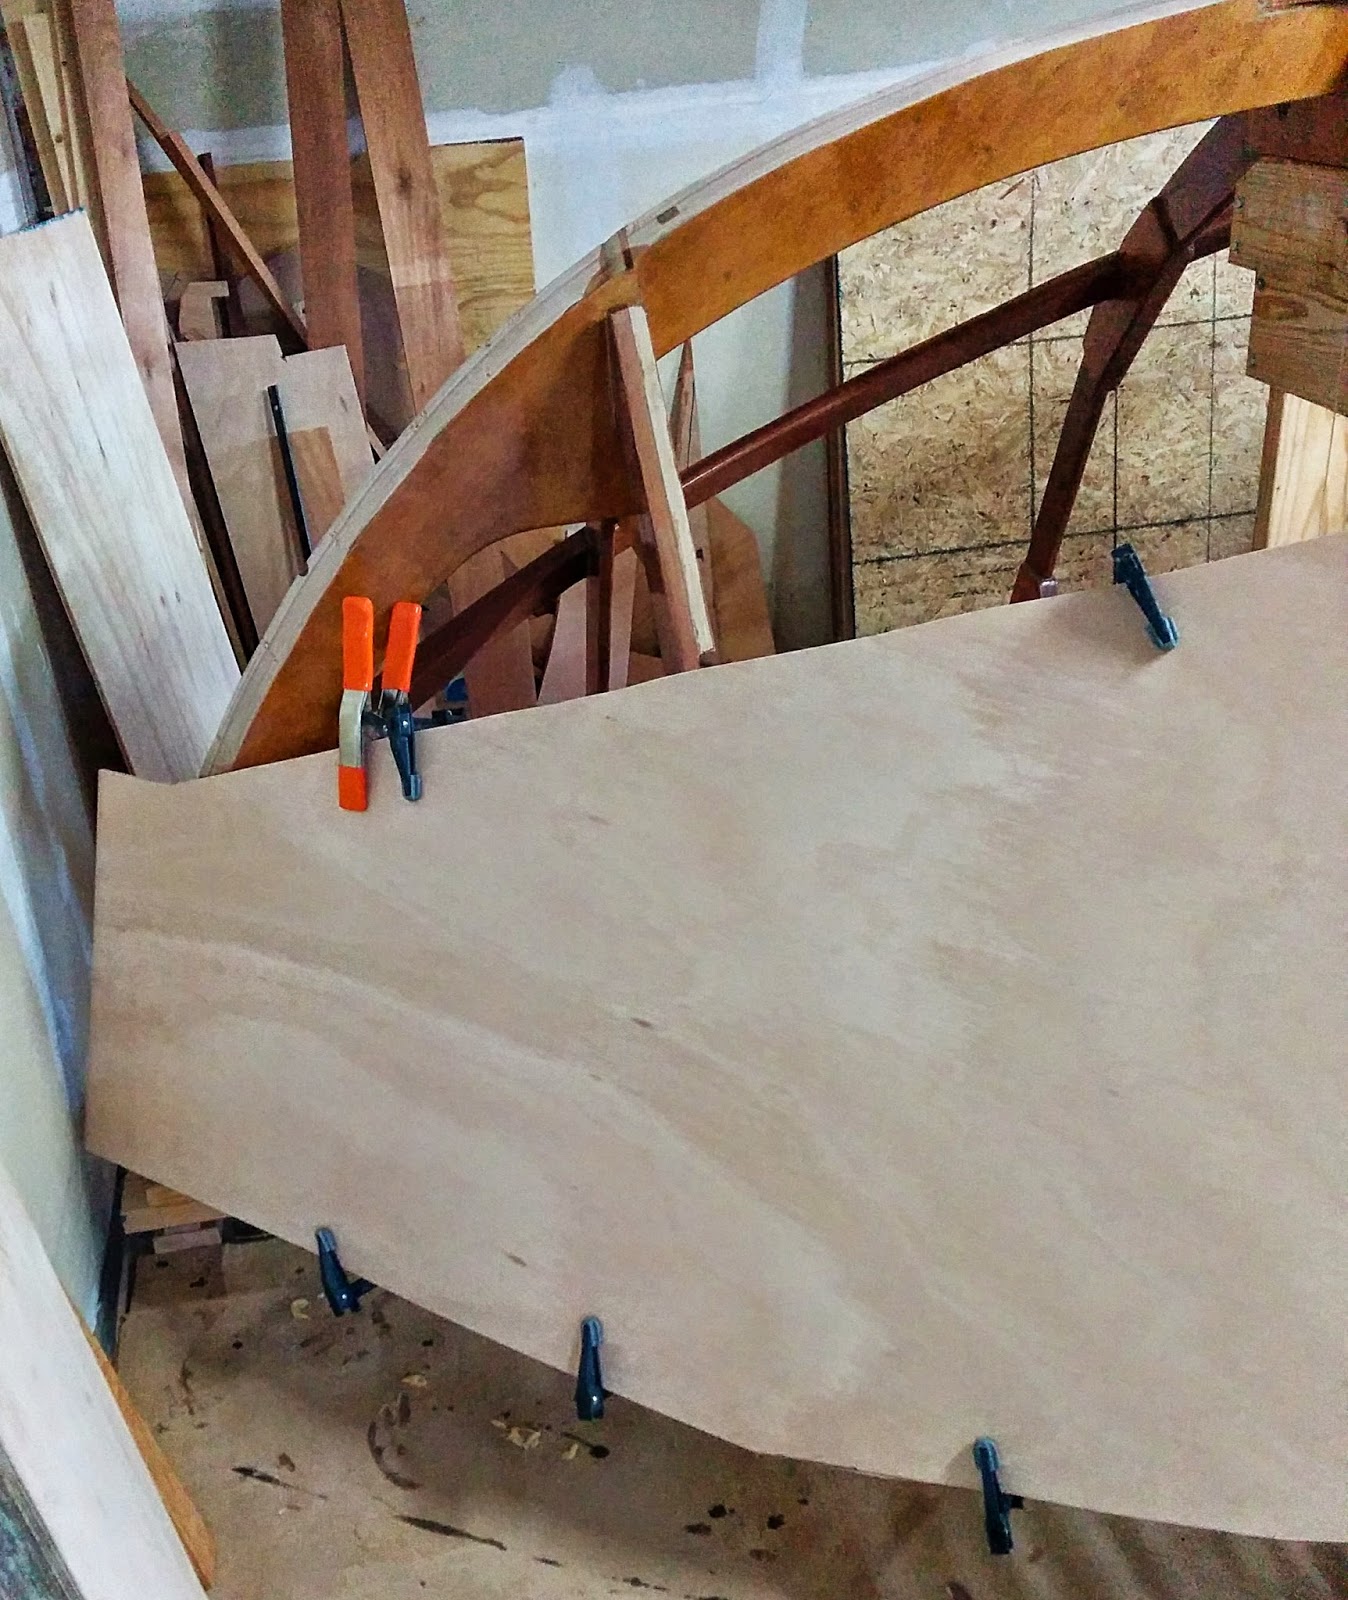
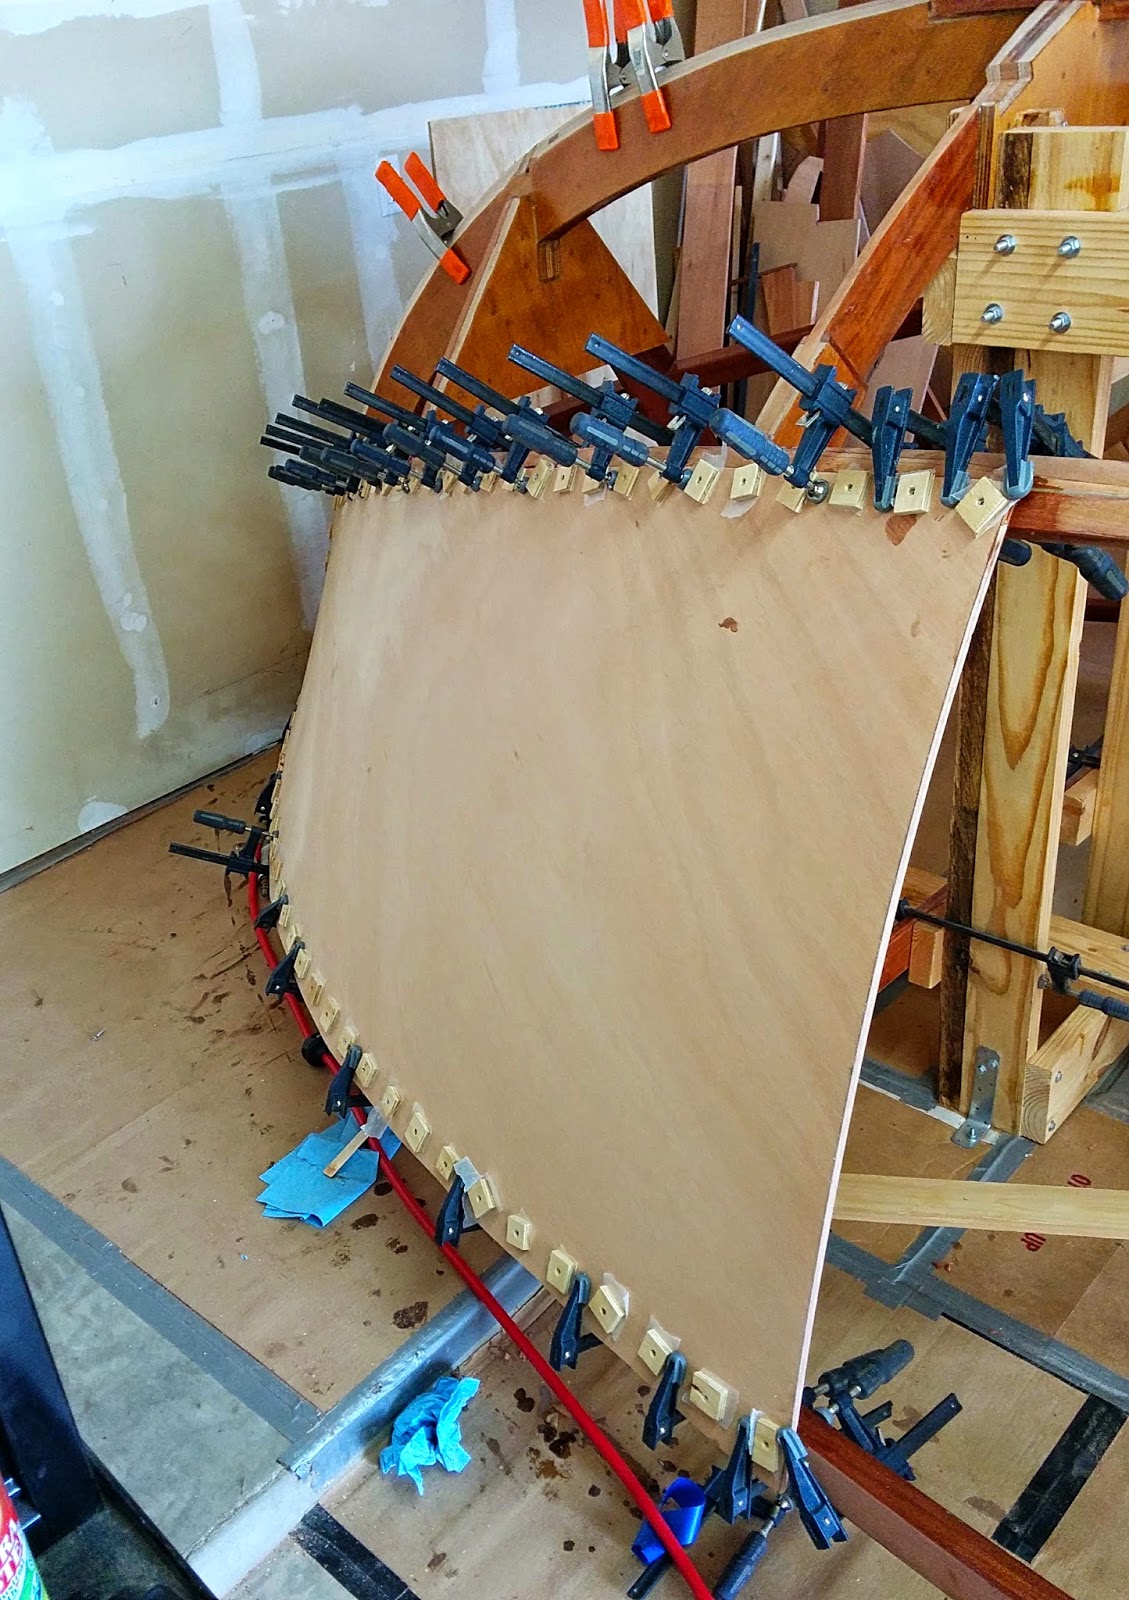
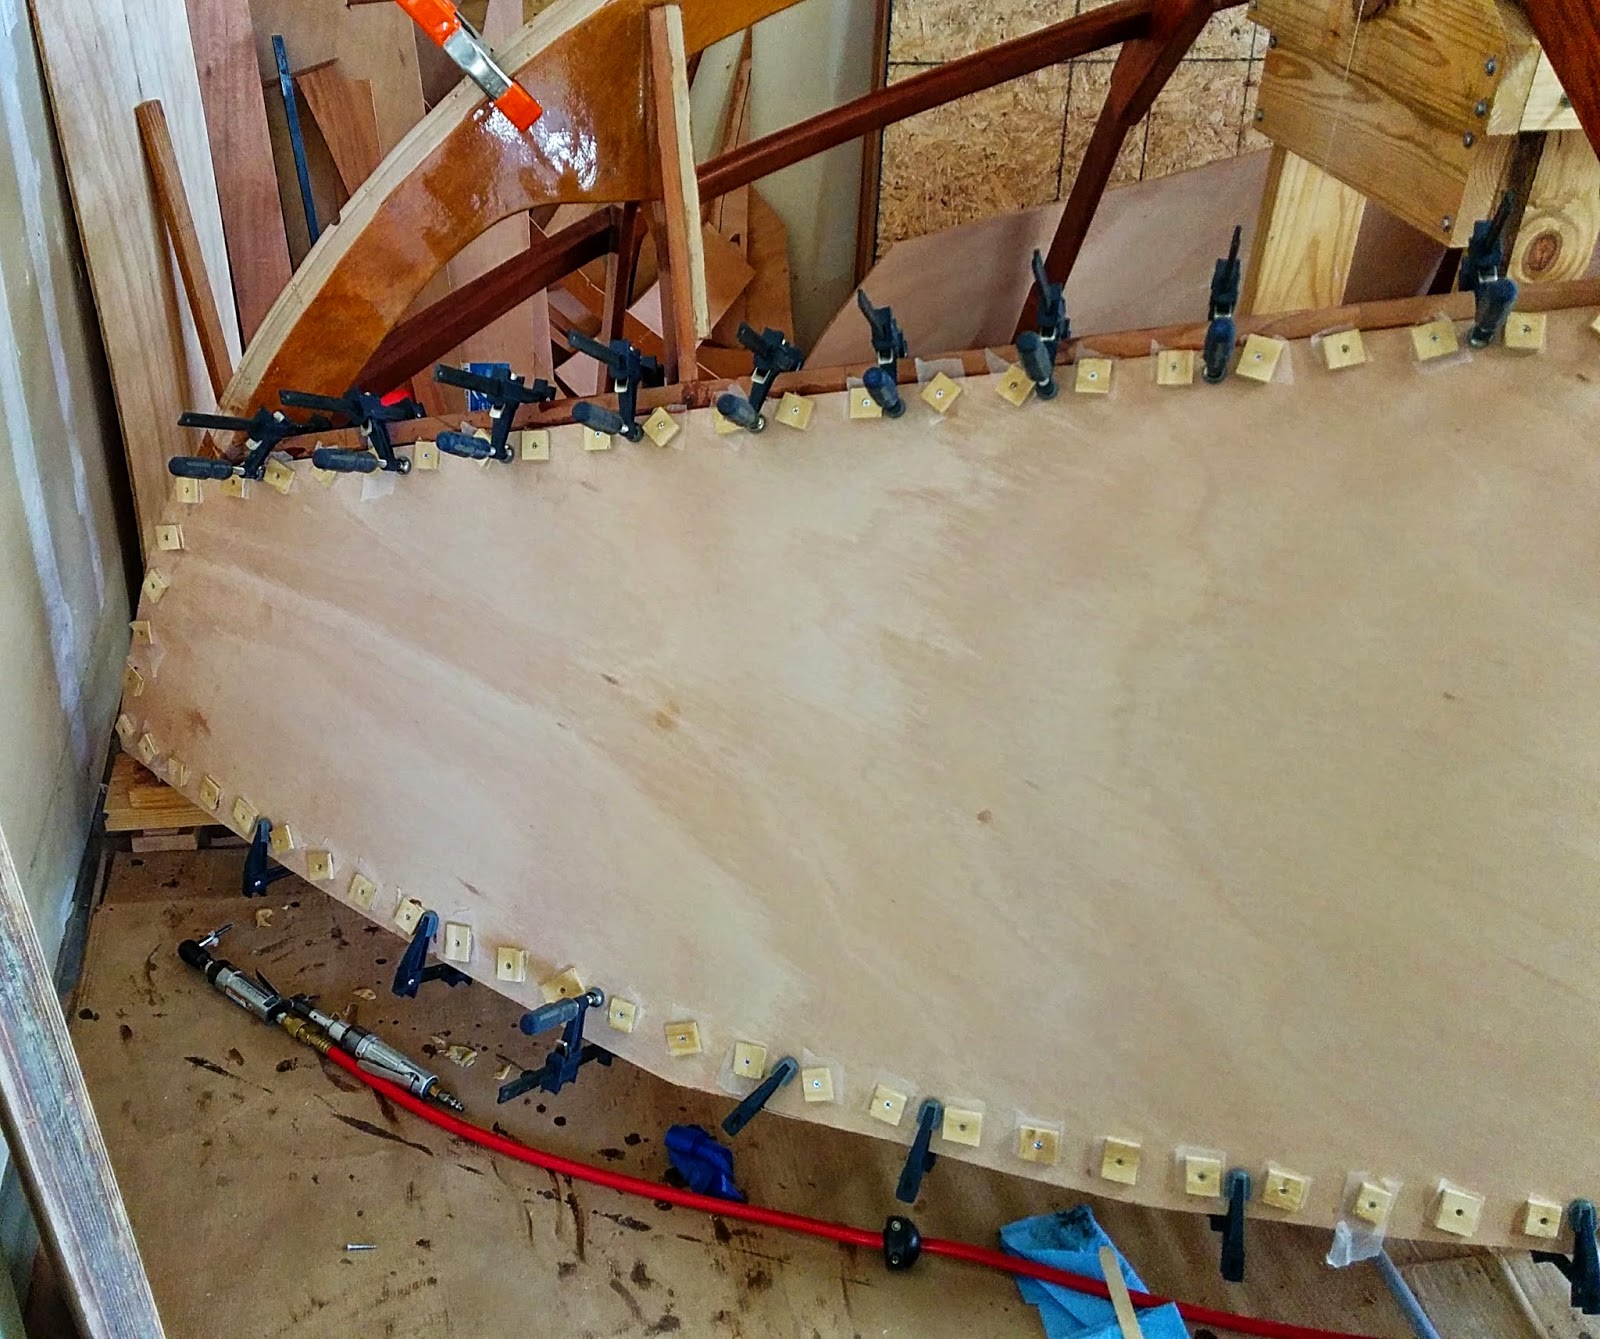
Back to the starboard front panel. Using the same sequence of steps I outlined in the last article, I proceeded to get the panel installed. As a recap, this basically meant tracing the structure outlines on the interior of the panel, using these tracings as guides to layout the screw holes, and final trimming the chine edge of the panel. This edge needed final trimming before installation because the bottom skins will eventually butt up to this edge and it would have been nearly impossible to clean this up after the panel was installed. The tracing of the chine on the panel gave me the reference points I needed to determine the cut line for this final trimming.
Youll notice that the curvature of the panel at the aft end (the butt joint ) is relatively flat and there should be no problem joining the center panel at this location.
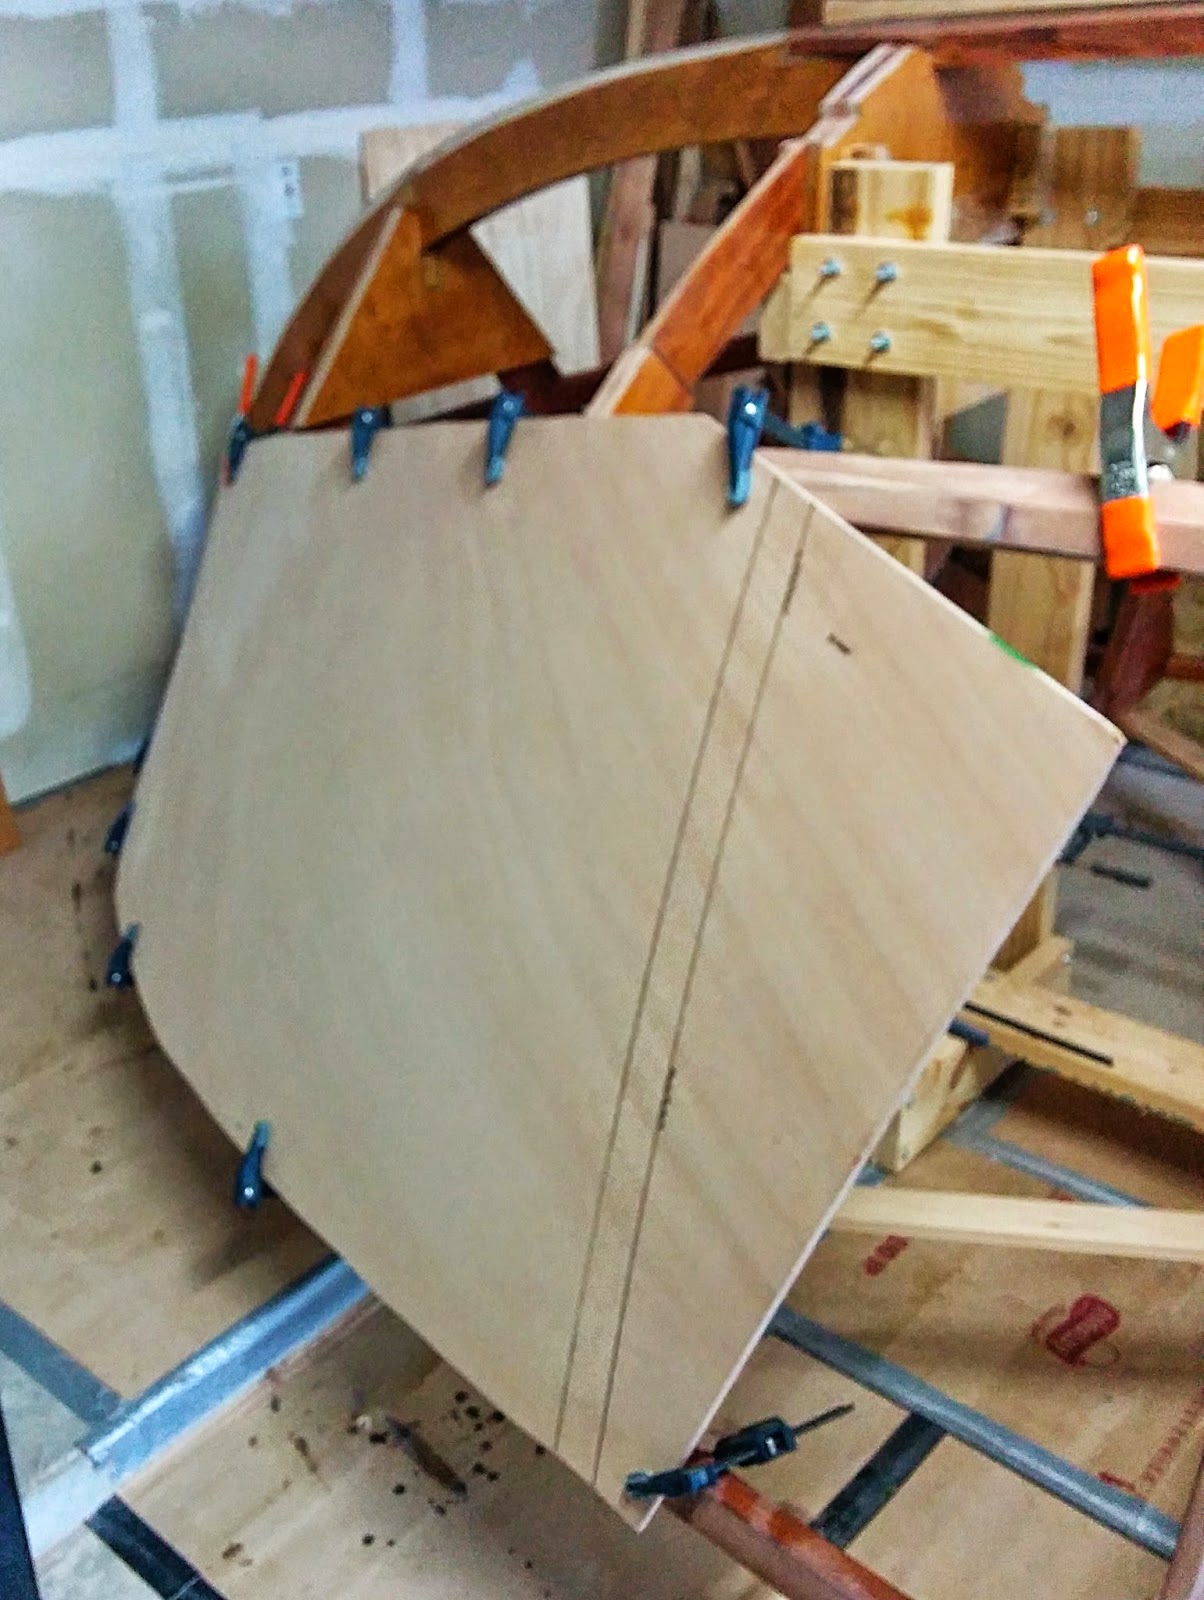
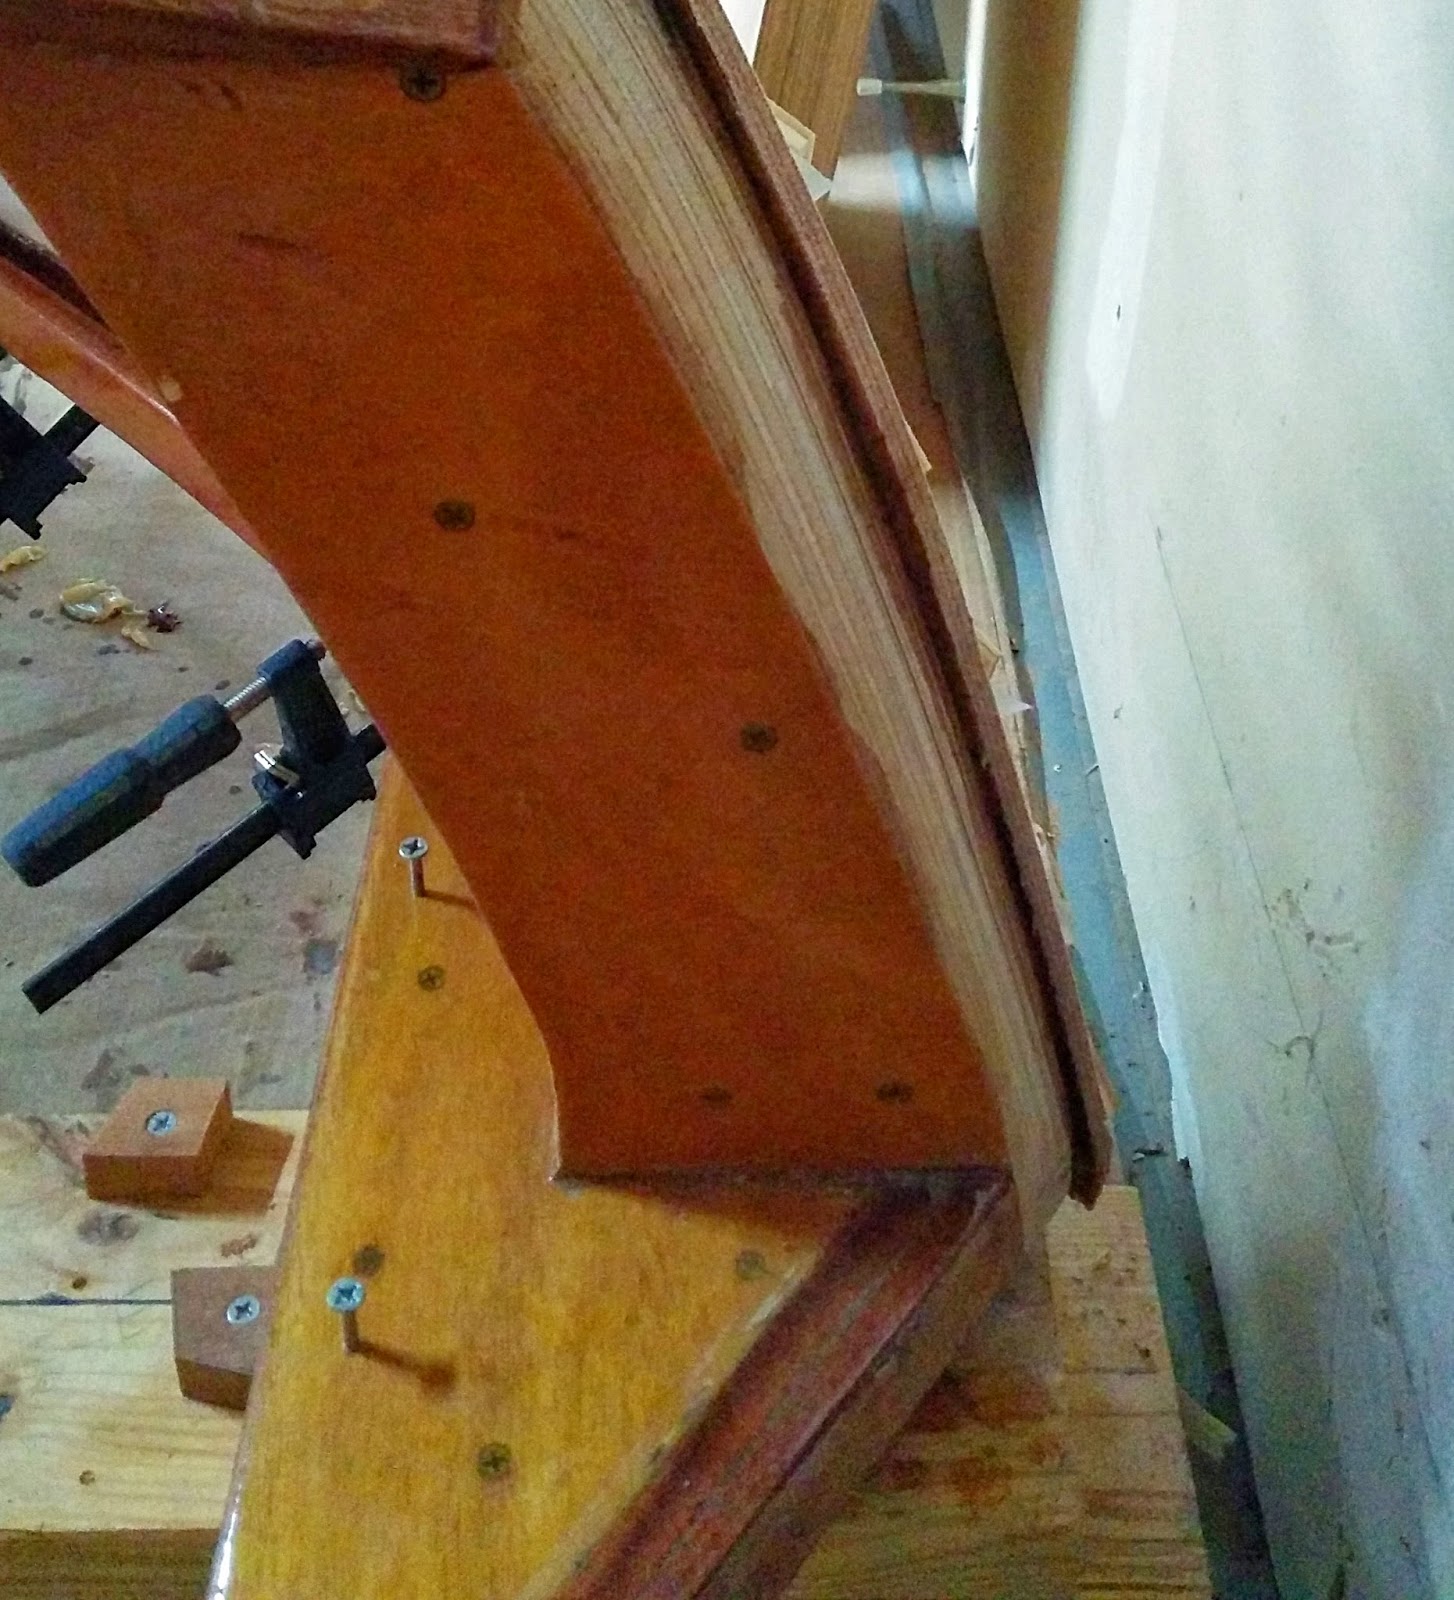
One other area of difficulty I had to contend with was at the very front of the panel. Because of the closeness of the boat to the garage back wall, there is insufficient room to get in there to pre-drill the screw holes into the structure and to install the screws during assembly using my battery powered drill. It is also a difficult area to clamp because the stem and breasthook get in the way.
I solved these problems by using an air powered angle drill to drill the holes and an air powered wrench and socket fitted with the screw tip to drive the screws. You can see these in the last of the previous photos.
Here are two photos showing the area in question. You can also see in the second photo, the overlap of the panel on the stem. This will need to be sanded back to the stem. When the other front panel is installed, it will overlap this first panel in this area.

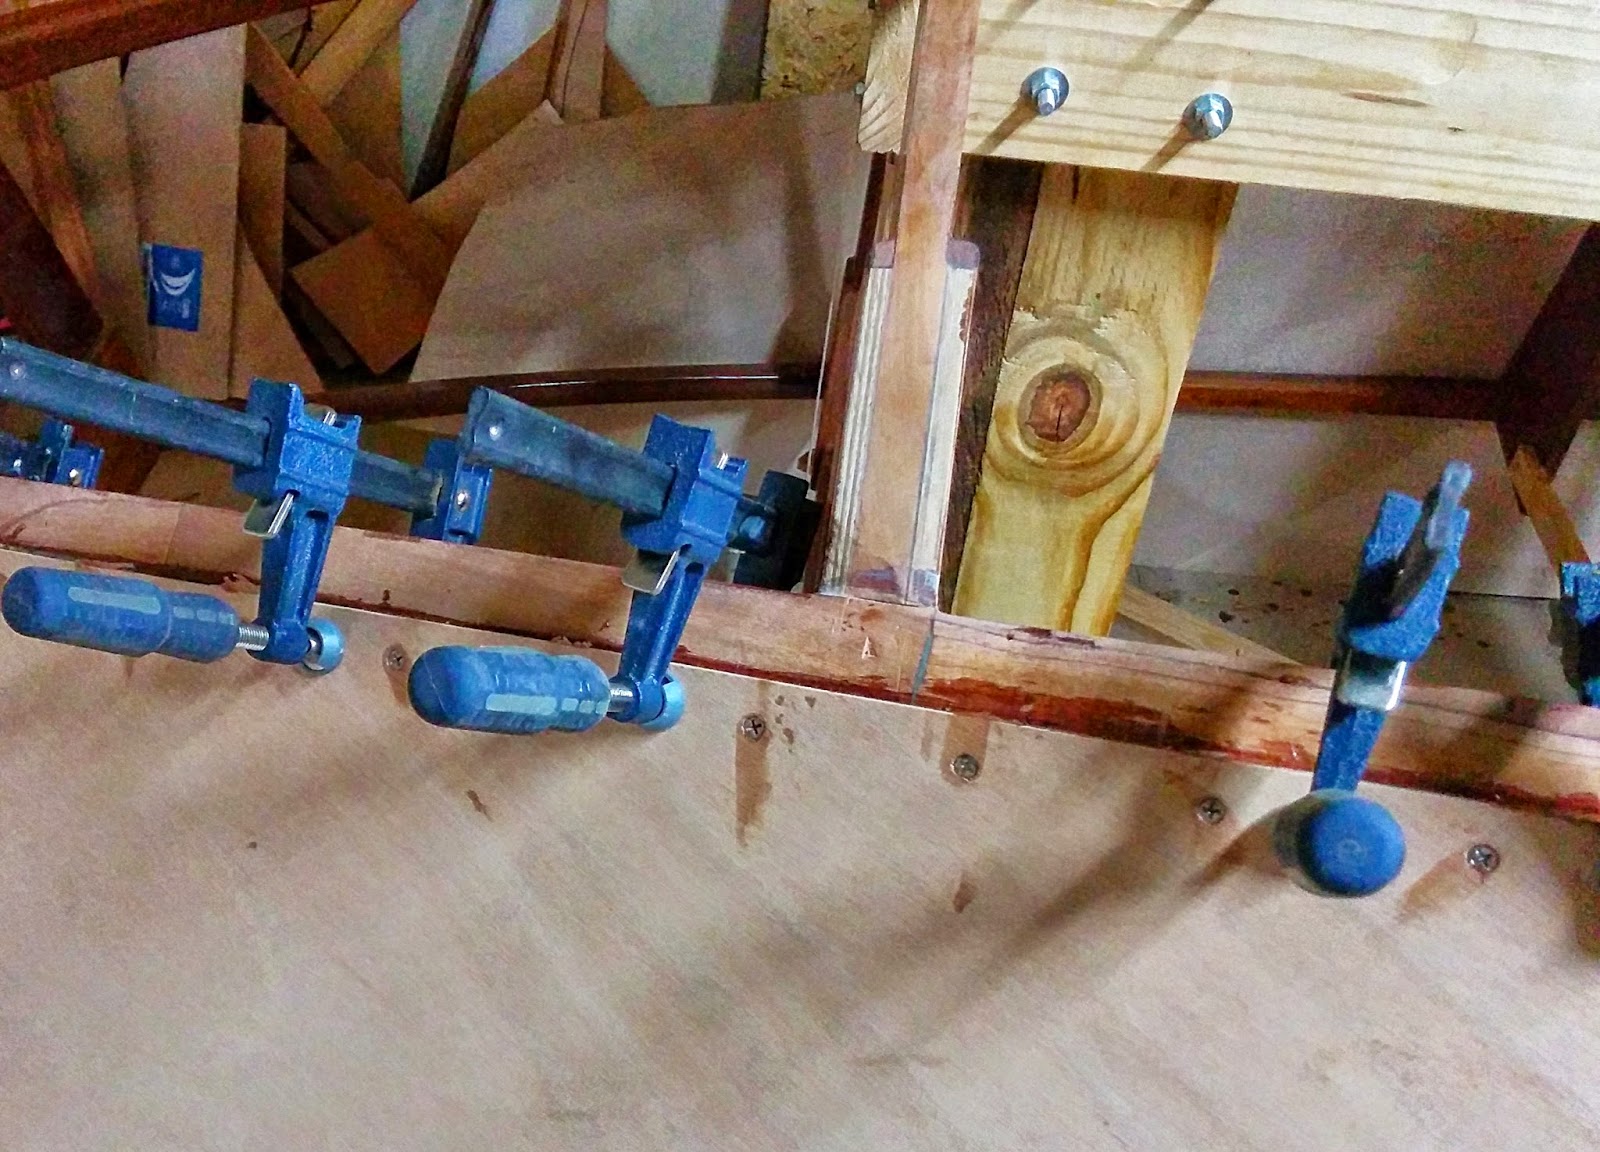
Because of difficulties I had with removing the temporary steel screws and plywood washers on the aft panels, I decided to remove these screws earlier in the process on this panel. Remember that these temporary screws are there simply to hold the panel in place while the epoxy cures. They are eventually replaced with permanent silicon bronze screws. I waited several hours until the epoxy was hardened, but not fully cured. The one by one, I removed the temporary screws and installed the permanent screws. I left the clamps in place to avoid putting any strain on the not fully cured epoxy.
These screws will eventually be filled over with putty and sanded smooth before I apply fiberglass cloth to the hull in a few months.
So the weather is a bit cooler today and I have other pressing things to take care of but I am hoping to to get the other front panel on by next weekend. Then I can begin to tackle the center panels. Those will involve the additional work of making and installing backing plates in the butt joint areas. I will explain all of that when I get to it.
Until next time.
Take care.
Readers may recall, that I had originally intended on making a single 24 foot long piece of plywood using scarf joints and then attempting to apply that panel in one shot. Knowing what I know now, I am glad I did not attempt to do that. More on that in a few moments.
The scarf joint approach was originally considered because I was afraid that the butt joint wouldnt conform to the curves of the boat all that well. However, the scarf joint approach presented several difficult problems to overcome. First, the length of three panels would have exceeded the length of my garage by 3 feet. I was unwilling to store the panels outdoors.
I though perhaps I could make a heavy paper template of the panels on the boat structure and then rough cut the 24 foot panel down to a more manageable size. But information I read seemed to indicate that this approach was risky because of the different flexibility characteristics of heavy paper when compared to plywood.
The second major challenge was how I was going to handle that large of a piece of plywood when fitting, and even more so when gluing the panel to the boat. I am working alone on this project and do not have a reliable source of extra hands so this was a major consideration.
I considered a hybrid approach where I would install the aft panels separately. The thinking here was that the aft panel butt joint is fairly flat so a scarf joint was not necessary here. I moved forward with that approach and installed both aft panels. Thats where I was at the end of the last posting.
Installing these aft panels made me aware of the amount of work and time required just to install the 8 foot piece of plywood. I was was battling cure times and my personal endurance just getting these installed. I began to realize that installing a much larger piece of plywood was going to be very difficult for me and run the risk of having the epoxy cure to an unworkable state before I finished installing the panel.
I decided to re-examine the possibility of using a second butt joint near the front of the boat. I first needed to get some idea of where an 8 foot panel would end if attached to the front of the boat. Since this area is curved, it was not easily measured. Only by attaching a similar sized piece of wood could I be sure where the second butt joint would be.
I had two full 8 foot long pieces of plywood that were left over from the aft panels. They were narrower but that wasnt a problem. So I clamped them into position on the bow.

This gave me a rough idea where a full panel would end. Then I clamped a scrap piece of plywood over that approximate area clamping to the sheer and the chine and over frame 4. What I was looking for here was the amount of curvature of the panel in a vertical direction. It didnt appear to be too pronounced and I began to have confidence that a second butt joint would work in this area as well.
I examined pictures of other examples of this design built by other builders and I saw that many of them also had butt joints in this same approximate location. At this point I was still thinking that I would install the center panel first and then install the forward panel last. But as I though about it more, I realized that installing the front panel first would be easier and then I would only have to fill in the center with the relatively flat center section. I considered the idea for awhile and could not think of any real reason not to do it this way, so that is the approach I ultimately decided to use.
The first order of business was to get a rough trimmed panel. I laid a full sheet of plywood in position and clamped it into place. Then I marked off very rough outlines where I needed to cut the panel.

After cutting these rough outlines, the panel was much easier to clamp back into position. From here I could refine the amount of material to trim off. As material is removed, it becomes progressively easier to re-install the panel because it is lighter and conforms to the curves better.


Youll notice in the first of the four photos that there is a vertical line marked on the panel. This would be the cut line for the but joint. Also notice how well the panel conforms to the curve when viewed from the inside. This is a testament to the design of the boat. I did notice that my chine fairing in this area was still a bit flat. This is in the area of the center clamp in the third picture.
I had to take a couple of days and build up the chine in that area before proceeding. Once that was completed, I re-installed the panel again and the fit was much better. Before proceeding further, I took the panel and checked it against the other side of the boat. This served two purposes. First a sanity check to insure that both sides of the boat are the same (they are). Secondly, I was able to use this first panel as a template to rough cut the second front panel from another sheet of plywood.
I took that second panel and test fitted it to the boat on the port side and saw that there would be no problems in getting it to install. A plus was that the chine on that side did not need any additional work. So when I get to that side later this week, I can proceed immediately to the fitting and installation.
Back to the starboard front panel. Using the same sequence of steps I outlined in the last article, I proceeded to get the panel installed. As a recap, this basically meant tracing the structure outlines on the interior of the panel, using these tracings as guides to layout the screw holes, and final trimming the chine edge of the panel. This edge needed final trimming before installation because the bottom skins will eventually butt up to this edge and it would have been nearly impossible to clean this up after the panel was installed. The tracing of the chine on the panel gave me the reference points I needed to determine the cut line for this final trimming.


Youll notice that the curvature of the panel at the aft end (the butt joint ) is relatively flat and there should be no problem joining the center panel at this location.
One other area of difficulty I had to contend with was at the very front of the panel. Because of the closeness of the boat to the garage back wall, there is insufficient room to get in there to pre-drill the screw holes into the structure and to install the screws during assembly using my battery powered drill. It is also a difficult area to clamp because the stem and breasthook get in the way.
I solved these problems by using an air powered angle drill to drill the holes and an air powered wrench and socket fitted with the screw tip to drive the screws. You can see these in the last of the previous photos.
Here are two photos showing the area in question. You can also see in the second photo, the overlap of the panel on the stem. This will need to be sanded back to the stem. When the other front panel is installed, it will overlap this first panel in this area.


Because of difficulties I had with removing the temporary steel screws and plywood washers on the aft panels, I decided to remove these screws earlier in the process on this panel. Remember that these temporary screws are there simply to hold the panel in place while the epoxy cures. They are eventually replaced with permanent silicon bronze screws. I waited several hours until the epoxy was hardened, but not fully cured. The one by one, I removed the temporary screws and installed the permanent screws. I left the clamps in place to avoid putting any strain on the not fully cured epoxy.

These screws will eventually be filled over with putty and sanded smooth before I apply fiberglass cloth to the hull in a few months.
So the weather is a bit cooler today and I have other pressing things to take care of but I am hoping to to get the other front panel on by next weekend. Then I can begin to tackle the center panels. Those will involve the additional work of making and installing backing plates in the butt joint areas. I will explain all of that when I get to it.
Until next time.
Take care.
Subscribe to:
Post Comments (Atom)
0 comments:
Post a Comment